

How to hide text behind stuff
A huge trend which came in the last two years all over Pinterest, Instagram and Social Media is to hide text behind things. Composing text and font into photos and images is a trend which literally took over the internet. It’s super easy to make and gives your image a 3 dimensional look. This small Photoshop tutorial shows you how to make this effective but super easy compositions so your social media posts can stand out!
And for those who want to learn a bit more about Photoshop, we add some quick tips which will speed up your Photoshop workflow.
It’s easy peasy lemon squeezy

Step no. 1: Choose your image. Try to use images and photos which contain different dimensions where we can hide the text behind. We used a part of a flatlay from our Pink Party styled stock & mockup.
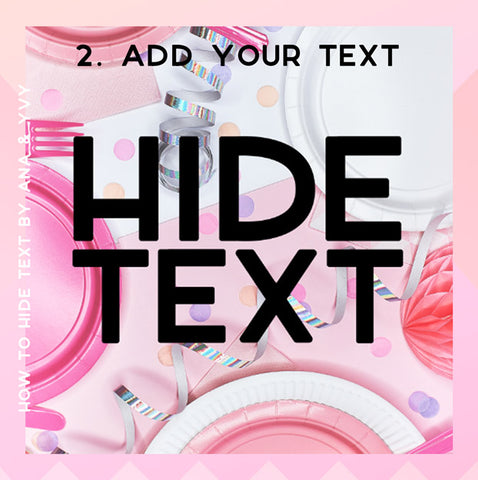
Step no. 2: Add your text by writing with the usual text tool in Photoshop or paste your handwriting as an image on a new layer.
How to use masks in Photoshop

Step no. 3: On the very bottom of your small layer window are seven different icons you can choose from. You need to focus on the third one – the masking button. Select your text layer and than click the masking button. Now a white mask layer should appear next to your text layer as you can see it in 4.

Step no. 4: Now you have a mask over your layer. You can’t see it because the mask is filled. Imagine the mask is a black sheet of paper and you cannot see through the black parts. If there are white parts, it’s like cutting holes into your imagined paper where you can see through. So let’s keep in mind: white mask = the things are visible, black mask = the things are invisible.

Step no. 5: Now that we understand how the mask feature works (black = invisible / white = visible) we can customize our mask as we like. Choose your brush tool. Try to use a brush sharpness that fits your object edges.
- Quick pro tip: You can choose it manual by clicking on it or simply press “b” on your keyboard. To get black and white as colors, press “d” on your keyboard and your color selects black and white automatically. You paint with the color you can see on the front. If you want to switch from black to white simply press “x” and the background color and front color will switch.
Understanding the composition

Step no. 6: Now select your mask (Not the layer itself. The selection will look like in image 4 where there is a white border around the mask) and simply paint “away” the parts of your text you want to hide. Try to be as precise as you can. If you overpainted by accident simply choose white as brush color and “bring the layer visibility back”.

Step no. 7: Play around with the objects you have in your image. As you can see the “E” is hidden so much, that it’s probably not readable. Try to take care of the readability, less is more 😉
- Side note: The advantages by using a mask instead of erasing the parts you don’t want to see in your original image is that your original image won’t be touched. If you want to learn more about masks and what kind of possibilities this feature gives you, please write us your question in the comments <3
Share the love
Have you tried our tutorial? Do you have any questions? Was this tutorial helpful for you? Was it easy to follow or are some things too complicated? Please write us in the comments your opinion so we can make better work for you and your needs! Thank you!
Or did everything worked well and you’ve made an amazing piece of art? Show us your results by tagging us on instagram in your story or post so we can see it!
We did a resume for you! You can pin it on your Pinterest Pinboard or save on your computer to follow along.